Friday, July 22, 2011

This guy....

Meet my brother's dog, Marlin.  He's named after the firearm, not the fish!
Picture 069
He is absolutely the sweetest pit bull I've ever met.  But, bless his heart, he doesn't have the best luck in the world.  Let me explain.....

About a month ago we had some very much needed rain.  It came in the form of what I would swear was a mini hurricane.  We lost giant limbs out of two pecan trees, and lightening hit our biggest.  My in-laws (The People Across the Pond) had a live oak completely uprooted.  It hailed, it set the woods on fire and it knocked the power out for hours.
Picture 066
Back to Marlin.  My brother works second shift and came home shortly after everything simmered down.  He knew about the bad storm, so he went to check on his pup.  Marlin wasn't in his pen.... his pen wasn't even there!  It was laying on the ground about 50 feet from where it had originally been, dismantled and nearly destroyed.  He still hasn't found the dog house that was inside of it.  Sure that Marlin had gone to safety with our dogs in the in-laws shed, he went inside and to bed.  The next morning, our pups were home, but Marlin still had not shown up.  That afternoon when he and his wife rode around the ponds surveying the damage.  That's when he heard it.... a tiny, distant yelp.  "That sounds like a dog in a dam," he thought.  Sure enough, there he was, in the damn dam overflow of the middle pond.  (If you look at the header picture, their house is now in the opening on the far right.  The middle pond is behind where the picture was taken, about the same distance away.  It's FAR.)  He was alive, but barely.  Will had to crawl in with Marlin to be able to pull him out.  Poor thing had tried and tried to climb his way out, filing down his nails to the quick and turning his pads into hamburger meat.  He recovered surprisingly fast!

Fast forward about three weeks. 

While at work, I got a text from my brother.  "How many wasp stings does it take to kill a 75 pound dog??"  Dear Lord.....

Jami and I frantically searched the internet.  Not surprisingly, we could only find something on how to treat one or two stings... not what Marlin was facing.  The best thing?  Benadryl and baking soda.  And lots of it!!
 I wouldn't think twice about saying that homeboy had a good 100+ stings all over his body.  His ears and under his chin were the worst.  I don't have a picture of it (I really didn't want to take one), but I'm sure you can imagine.  I didn't think it was wasps, though.  Will hadn't actually seen what stung Marlin, and I had a better guess.  Bees!  The farmers have bee hives scattered through the fields around here.  There's a huge pile of them right across the road from our house.  My sister-in-law and I drove over to check them out and, sure enough, one of them looked to be slightly tipped over.  We didn't get too close to really check it out, but I'm sure that's where they came from. 

The swelling didn't last long, but he's got polka dot skin!  He almost looks like something out of a circus show.  Not really funny, but we have to smile about it now.  :)

Less than a week later, Marlin went missing again, still sporting his polka dot, mange-looking skin.  The doggie police got him!  He's back at home now.  I can only imagine what they were thinking was wrong with him!  On top of the stings, he was covered in fleas when he got home!  Poor fella! 

Maybe this time he's learned his lesson.  I kinda doubt it!
Picture 068
So, the next time you think you've got it bad.... remember sweet 'ole Marlin.  It could be worse!

Friday, April 29, 2011

Baby Chickens!!

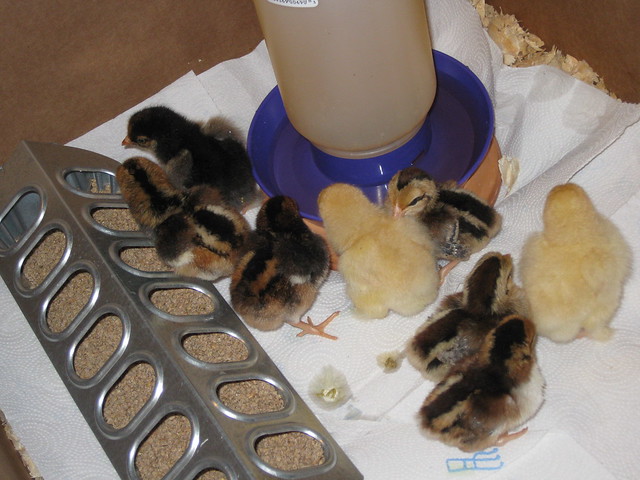
A couple of weeks ago, Jami had to stay home from work due to a bad case of poison ivy all over his hands (it would later spread to almost every inch of his body).  He and I carpool to work everyday and he's the type that as soon as we get off he doesn't want to do anything but head straight for the house.  We were getting low on pup food, so I took the opportunity to run across town to Tractor Supply and pick some up.  Of course, it was right in the middle of their Chick Days and they had just gotten a shipment in that morning.  I puttered over to the bins and laid eyes on 8 adorable little bantam chickens!  I didn't go there expecting to come home with chickens.  Really, I didn't, but I already had my brooder set up and there were only the eight left in the bin, so in my cart they went!

Aren't they just the cutest?!
Picture 055
The black one in the top left corner and the two blond chickens have feathered feet.  My gut tells me the blonds are Buff Cochins and the other may be a Silver or Golden Laced Cochin.  One of the chipmunk looking biddies has greenish feet and legs so I'm thinking an Americauna.  Really, I have no idea what kinds they are!  They're almost 4 weeks now and are getting a lot of feathers in, so soon I'll post a picture at Back Yard Chickens to get some help identifying them.  Of course I'll post a picture and my findings here, too!

In March, I placed and order for Buckeye and Delaware chickens, but their hatch date isn't until June 1.  I picked the Buckeyes and let my niece choose a breed for her to raise.  I'm super pleased with her choice as these will both be suitable for eggs and meat.  I'm still unsure of my capabilities to cull a chicken that I've raised from a baby, though I am certain I can clean it once the deed has been done.  Jami and I have an agreement.... he does the dirty work and I'll do the rest.  Sounds pretty good to me! 

The coop is almost completed and I cannot wait to show it to you!  The only things we've had to purchase for it is a couple of boxes of nails and some wire.  It's definitely not the prettiest thing, but I'm betting my chickens will think it's the most magnificent home ever!

Wednesday, April 27, 2011

Hen Nest Box Giveway at Life on a Southern Farm!

We've been busy building a chicken coop from used materials we've found in our yard, our parents, and the old paintball field!  Just in time, too, because yesterday I came home to find one of my biddies piddling around my spare room!!  They're only about 4 weeks old, but already they're trying to fly around and this little one was able to get out of the cardboard box I've been using as the brooder!  The only things we lack on the coop is building the door for the run and putting in some nest boxes. 

For the boxes, we have some blue, plastic Pepsi crates (the ones the truck brings the 20oz. bottles to the jiffy stores in) that will be screwed into the interior walls of the hen house.  Not pretty, but free and practical!  BUT, a favorite blog of mine is having a giveaway for a two hole, metal hen box that they make on their farm!!  I would love to win this myself, but I also want to tell you about it so that you can get in the running as well!!  Head over to Life on a Southern Farm (Yes! They're in Georgia, too!!!) and enter to win one of these gorgeous boxes!  If you're into farm living at all, I suggest you follow their wonderful blog, too!

Friday, April 22, 2011

Happy Easter... Lilies!

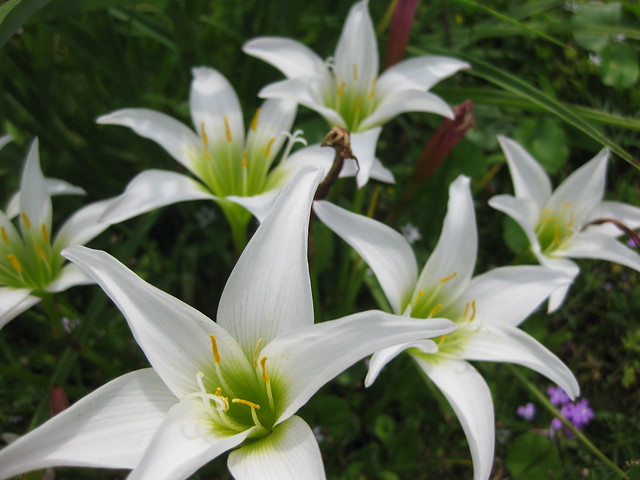
Every year as the end of March rolls around, a beautiful sight begins to unfold in the ditches along these Southern roads.....
Easter Lily
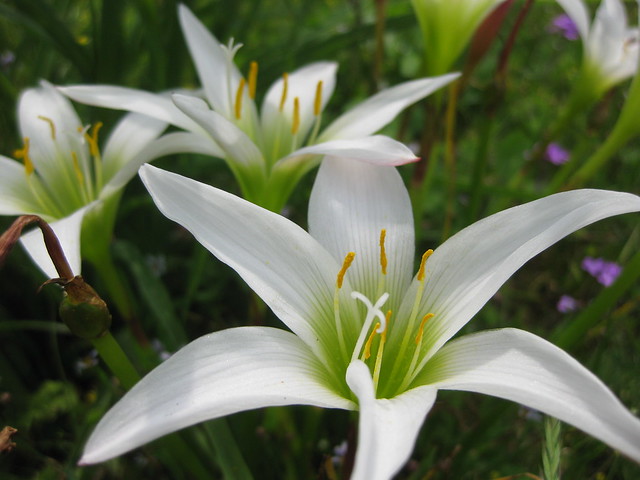
The Easter Lilies, as we've always called them, are a sure sign that the Earth has awakened and Spring is finally here!  According to information I've found, the common name for Zephyranthes atamasca is Rain Lily, but that's not what we call them, nor have I ever heard someone refer to them as such.
Wild Easter Lily
You can read more about these beautiful flowers here.

PS.
  Have you ever looked at the new growth on pine trees around this time of year?  Way up at the top, the new growth forms a cross all over the tops of the trees.  Do they know Easter is right around the corner?

PPS.
  Happy Earth Day!!!

Tuesday, March 8, 2011

Spring Seed Order

I finally got off of my butt and ordered my vegetable seeds on Valentines day!  After looking through catalog after catalog, I decided to go with Southern Exposure Seed Exchange.  They are based out of Central Virginia and specialize in varieties that are adapted to my neck of the woods.  There were so many selections of each vegetable with tantalizing descriptions, it made it so very difficult for me to decide which I would get!  It literally took me a month of going through the catalog, researching the plants needs and putting together a simple garden layout to finally commit to the varieties I chose.  I think I will be quite satisfied!

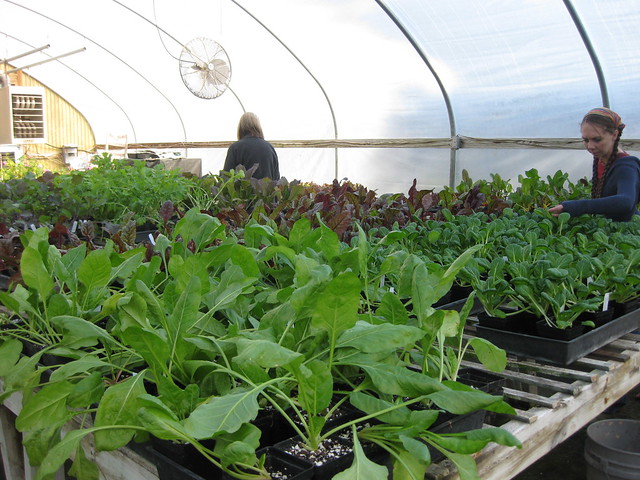
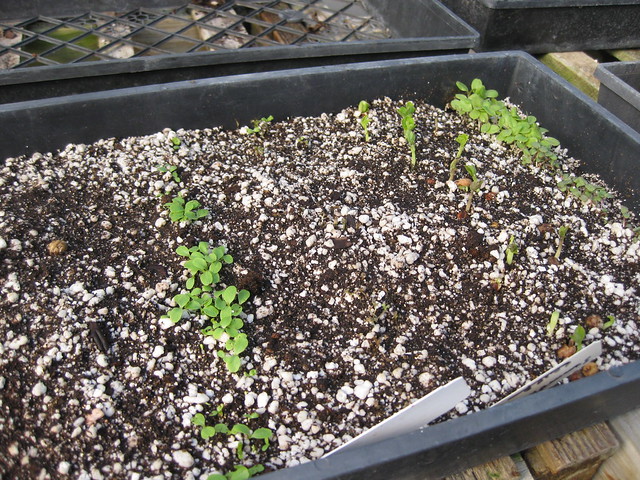
The tomato and various pepper seeds have already been started in the greenhouse, while the rest will be directly sewn in the garden.  Our last average frost date is (depending on where you look) anywhere from March 1 through March 14.  The garden is ready to go now, but to be safe I won't be putting my seeds out for around another 2 weeks.  The anticipation is killing me!  In the mean time I'll be reorganizing my greenhouse and dreaming of a luscious garden!

So, would you like to know what I will be growing?  Of course!
  • Hungarian Italian Paste Tomato -  I don't eat tomatoes straight, but wanted to grow some.  I LOVE a good tomato sauce, however, so I hope to be putting up lots this Summer!
  • Chinese Five Color Pepper - My step-grandmother used to have these growing all around her yard.  At dinner time, she would pick a dish and eat them straight out of the bowl!  I don't know how they didn't burn the ever loving life out of her mouth, but she made them look so good!  Mostly, I got this variety for the nostalgia and beauty, but I'm also excited to see how a pepper sauce will taste.
  • Jalapeño Pepper - My brother goes through gallon size jars of these like there ain't no tomorrow... we're kinda fond of them, too!  We also eat the rear end out of Banana Peppers, so I got some of those as well.  Last year I grew a hot banana pepper.  I really liked those, but didn't want to grow two varieties of the same pepper.
  • Alabama Red Okra - I have a new fondness for fried okra and it grows like weeds in the Deep South!  This variety is said to be excellent fried and will add a little color to the garden with its red tips.
  • Zipper Cream Pea - Jami's favorite pea.  'Nough said!
  • Henderson Bush Lima Bean - My favorite veggie.  'Nough said!
  • Tennessee Red Valencia Peanut - I LOVE boiled peanuts!  In the Summer, I'm pretty much the peanut lady... I'll make them almost every weekend, especially if we're going canoeing.  There's nothing better than floating down the river and washing boiled peanuts down with an ice cold beer!  If you've never had or heard of boiled peanuts, I highly suggest you try them!  It's a true Southern Heritage food.  This is a brand new venture for me and I'll probably not be able to grow nearly all that I will eat this Summer, but I think it will be something fun to try!
  • Seminole Pumpkin - This variety has been grown in Florida for hundreds of years, but is quickly becoming an endangered food.  After reading a bit about the Seminole Pumpkin, I knew I had to grow it.
  • Midewiwan Sacred Tobacco - According to the description on SESE's website, the dried leaves are good for making an insecticide.  I'd heard of this method before and decided to give it a try since I was already ordering seeds.  The tobacco will have to be grown in a seperate place in the yard, so I hope if nothing else, it will be a pretty plant!
  • Cherokee Cornfield Pole BeanStowells Evergreen Sweet Corn, and Waltham Butternut Squash all chosen to build a Three Sisters Garden.  This will be my first foray into companion planting!  I love how the three veggies work off of each other.  The corn and beans were an easy choice, but the squash was another story!  After trying out a few different winter squash varieties, we chose the butternut for its sweet taste and good storage ability.
I also picked up the book Seed to Seed by Suzanne Ashworth, which I have been wanting for over a year now!  I can say that my expectations were exceeded!!  Taking the leap and buying a bunch of seeds can be a bit pricey, but well worth it if I can turn that one purchase into a lifetime's worth of seeds.  Another step in our mission to become more self sufficient!

What will you be growing in your garden this year?  Be it in the ground or just in your head!

Friday, January 28, 2011

Baby it's cold outside!

And a husky just can't handle the cold.... right?  Hello?
Lazy, lazy dog
She's so spoiled  :)

Thursday, January 20, 2011

30/30 Hooping, Week 1 Wrap Up

I've been doing amazingly well at this challenge so far!  I'm keeping a little journal of my progress and the amount of time that I'm spending hooping.  Here's what I've got for the first week:

Day 1, Saturday 1/8/11
  Hooped with Megan and Lazer Friday night into Saturday morning, focusing mostly on isolation's and vertical waist hooping, for 2 1/2 hours.  Did sporadic hooping Saturday afternoon adding up to 35 minutes.

Day 2, Sunday 1/9/11
  So very sore from the Friday night/Saturday morning session that I had to again break it down into 5 minute intervals.  Just barely made it to 30 minutes!

Day 3, Monday 1/10/11
  Hooped 40 minutes solid, mixing it up.  Tried the one leg hooping... definitely need to practice that a lot more!  Got me a little scrape on the leg from it  :)  Jami played Telepath's 30 Minute Mix for me.  I think it may be the best song to do a 30 minute hoop jam to!

Day 4, Tuesday 1/11/11
  Focused solely on my arms for a solid 30 minutes.  Getting better at isolations! My muscles are starting to handle the cat eye, but it's going to take a hell of a lot of practice to get good at them.

Day 5, Wednesday 1/12/11
  Hooped for about 40 minutes, only waist hooping the "wrong way" (meaning the hoop is going counter-clockwise instead of my natural clockwise.  I am the only hooper that I personally know who spins it this direction!)  I remember now how hard it was to keep the hoop up and going in the beginning!!  I think I'm going to have a shiny new bruise on the ole hip bone.

Day 6, Thursday 1/13/11
  Free styled for somewhere around 1 hour and 45 minutes!!  It's definitely getting easier to hoop for such a long time, but I am taking short 1-2 minute breaks when I need liquids or the potty  :)  Left hip does have a nice bruise from yesterday.  I feel like a newbie again!  LOL!

Day 7, Friday 1/14/11
  *I waited too long to write this day down and now I don't remember exactly what all I did!*
Hooped for 30 minutes.  Did a lot of hip hooping the "wrong way" and free styled.

Total: 460 minutes baby! Of course that does included the 2 1/2 hours from late Friday into the wee hours of Saturday :-P  but I'm counting those too dad gum it!

About three months ago I weighed in at 132 lbs.  With only sporadic hooping, I went down to 120 before starting this challenge.  Keep in mind that I just barely hit the 5' mark so I'm not scrawny by any means!  I haven't weighed myself since (I don't own a scale ;-) ), nor have I measured any inches, but I can definitely tell that my body is already toning up and, really, that's all that matters!

Update:
  I did keep up with this challenge all the way up to the 3rd week of it!  After that third week rolled around, though, life kicked in with a glorious bang!  Our afternoons and weekends were filled with preperations for an event we were hosting in one of our back fields on February 12th, Love Fest!  I had no idea how much work goes into something like that.  We ended up with two DJ's, two acoustic sets, and 5 bands playing!!  So, although I wasn't able to get in a full 30 minutes of hooping everyday, my hoop didn't got without at least getting picked up for 5 or so minutes for a little stress relief    :)   I did learn that 30 minutes of hooping every day is not quite as feasable as I had thought it would be and to not beat myself up when I go for a few days without even looking at a hoop!  It was fun and I will probably try it again when Winter rolls around, but I need to take it one day at a time first!

Thursday, January 13, 2011

Social Thursday

Instead of trying to find a specific song to share today, I'm just gonna give you a new artist to explore for yourself!

We first heard of Toubab Krewe this past November at the Bear Creek Music Festival.  They blew our socks off!  Their sound is something I've never heard before.  It is amazing!  Even cooler is that their record label is National Geographic Records.  I didn't know there was such a thing!

Check 'em out.  They're on tour right now, too!

Another visit to O'Tooles Organic Herb Farm

Back in the beginning of December, my mother-in-law, best friend and I made another trip to Madison, Fl to visit O'Tooles once again.  The mission for this trip was to see a soap making demonstration with the owner of Magnolia Hill Soap.  She was running a bit late that morning, so we decided to browse the greenhouses.  There are two large greenhouses, one containing mostly herbs and the other veggies.
Browsing the greenhouses
I can't tell you how tempting it is to just pick and eat! Ha!

There were also a few vendors on the grounds (it was open house at the farm), so after browsing the greenhouses we stepped outside to check them out.  It was early morning and they were just beginning to set up, so there were only a handful that we could visit.  One of them was the local Dreaming Cow Creamery from Pavo, Ga.  We spoke with one of the owners, Kyle Wehner, and learned about their sustainable practices on their farm and got to sample their more than delicious yogurt. 

We then stopped over to visit the Golden's who run Golden Acres Ranch in Monticello, Fl.  Bobbie and Fred are a lovely couple and are very happy to share any information they have with you.  They raise goats (you can order their meats) and have a huge lot of mayhaw trees.  We got to sample some of their homemade mayhaw jelly and the absolute best cranberry sauce/jelly in the entire world!  Mayhaws are more of a southern thing, so if you've never hear of them, I would seriously suggest you find yourself some!  To me, it is the best jelly you can get, hands down.

We spent a good bit of time talking with each of these vendors... so much so that we totally missed the soap making demonstration!  We walked up just as she was packing.  We did get to speak with Marge, the owner, for a few minutes, but didn't want to take up too much of her time since she had just gotten through answering those same questions.  I picked up a couple of bars of soap and some calendula salve.  The soaps are amazing and I have been using the salve as a moisturizer. 

Back in the greenhouses, I discovered a method of seed starting that I hadn't even considered yet.
Seed starting tray at O'Tooles Organic Herb Farm
Previously, I have been starting my seeds in a tray with individual cells.  The cells on each are pretty small and it takes a little bit of convincing to get the seedling out without damage.  I imagine just a little scoop in a tray like this will release the little seedlings with no harm and make for easier planting in the ground or larger pots.  If I can ever decide what seeds and which catalog to get them from, I'll be doing my Spring greenhouse seed starting just like this!

This was our last trip to the farm for a little while as she takes a break in January and reopens for the weekends in March.  I'll go back then to get some plants that I only want a couple of and not have to worry with starting difficult seeds!

Are you planning a garden for the Spring?  How about having a small container garden?  You can squeeze in a veggie, herb, or two even in the smallest of places!

Tuesday, January 11, 2011

Creamed Collards

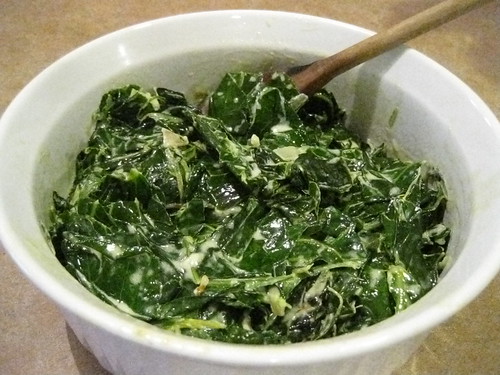
I just recently, as in about 2 months ago, started eating collard greens.  Growing up my brother was always a huge fan of them, but I wouldn't touch them with a ten foot pole!  I finally tried them at my grandpa's birthday celebration with a little pepper sauce sprinkled on top (the way my brother fixed his). Yum!  Then came New Years.  This year I wanted to cook our dinner at home, including all the traditional New Year's meal foods.  The only problem was I had never even watched someone cook greens in my entire life!  Off to the web I went and found the perfect recipe on Nourished Kitchen.  Collard greens soaked in heavy cream?!  I almost drooled on the keyboard when I saw the beautiful pictures!  My husband doesn't like greens and I thought that making this recipe may actually get him to try them.  Not only did he, but he had seconds AND I had to cook another round to fill us and our 2 friends up!  Try this, you won't be disappointed!

Picture 026


Creamed Collards
     Slightly changed from the original recipe found at Nourished Kitchen

* 2 Tbsp Butter
* 1/2 yellow onion, diced
* 1 bunch collard greens
* 1 cup heavy cream

Wash collards and remove stems.  Tear or chop the leaves into small sizes.  Melt the butter in a skillet over medium to medium/high heat.  Add the onions and cook until slightly caramelized.  Toss the collards into the pan, adding as much as you can at a time, letting that slightly wilt, then repeat until all of the collards have been added.  Cook until the collards are well wilted, about 4-5 minutes, stirring occasionally.  Pour in the heavy cream and simmer about 6 minutes until the cream is largely reduced.  Serve hot and sprinkle a little salt on top!

The main difference in my recipe is the amount of collards used. One bunch, to me, seemed like plenty for the one cup of heavy cream. Maybe that's just the Southern Girl in me! I also increased the cooking time. This could be because the author from Nourished Kitchen is in the Mountains and I am below sea level. Adjust this recipe to your own taste. I don't think you could really go wrong!

The 30/30 Hoop Challenge

Last week Rayna McInturf, a most awesome hooper, announced a challenge on Hooping.org.  Starting on the 8th, you commit to hooping for at leat 30 minutes everyday for 30 days.  This is just the thing I need to motivate me to reach one of my New Year's goals!  One thing that really stuck out to me in Rayna's article was this: "It takes the human brain almost exactly 21 days to develop a new habit and after about a month it should feel harder not to do the activity."

So far I have been doing great with hooping well over 30 minutes solid everyday except Sunday, when I was so sore from the hours of hooping on Saturday that I had to break up the practice to a few minutes at a time!  I've recruited several of my friends, and although we aren't posting to Hooping.org, we'll have our own prize at the end of our personal challenges: a wonderful sense of accomplishment from committing and sticking to something, a more toned body, and the ablility to kick ass on the hoop! 

The 30/30 Challenge doesn't have to be about hooping, though!  Think of something you'd like to do, maybe a New Years Goal you really want to commit to.  Turn it into your own personal challenge! 

Wanee Hoopers
Me and my neice at the Wanee Festival this past Spring, just as my hooping obsession was taking off

Friday, January 7, 2011

Bar stools make me giggle?

My brother is about to finish up his upstairs bar room and I was looking at getting him some bar stools.  I came across these and had a little laugh to myself!  How funny is that?!?

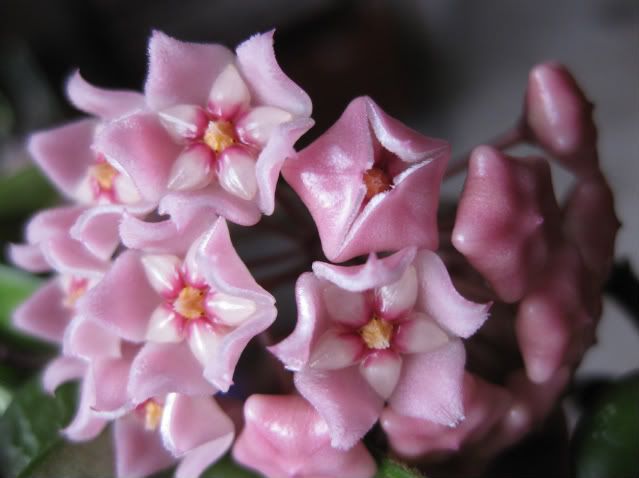
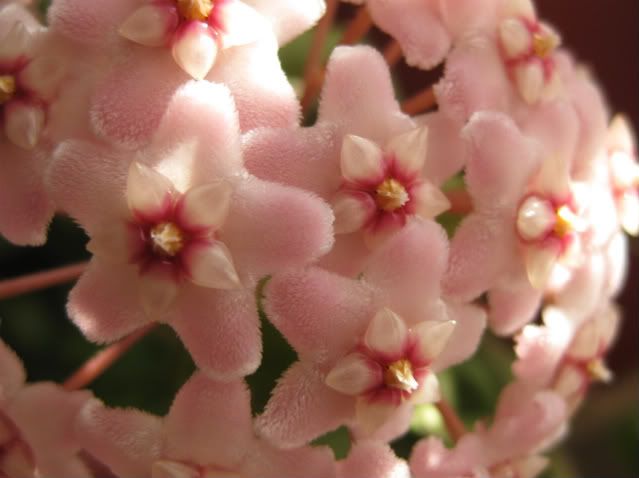
Hoya Carnosa Krinkle Curl

There's not much blooming around the house here lately.  In fact, I can't think of anything other than my orchid that just started blooming!  Oh, I can't wait for Spring!

About a month ago I uploaded some pictures of my Hindu Rope Hoya to photobucket and forgot all about it.  So to help brighten the dreary days of Winter and make us long for warm weather all the more, I'm breaking out those old photos.

On several gardening forums I've read about people having big trouble getting their hoyas to bloom.  To me, the hoya is one of the easiest, low maintince plants to grow.  Maybe they're trying too hard, as mine seem to do best with a little neglect!

Hoyas like bright, indirect light and well drained soil.  I keep mine hanging in a western facing window, with white blinds that usually stay shut.  On occasion, and more so in the winter, I will open the blinds for a few hours to let a little extra light in.  The soil is a fast draining mix, similar to what you would use for an orchid, with a sphagnum moss and light soil mixture.  Hoyas like to be root bound so if you get a new plant you probably won't need to repot it for some time; mine's been in the same pot for 4 years!   I water it about once a week, sometimes less frequently, judging by the weight of the pot and the top of the soil.  It seems mine do best when I let the soil get almost all the way dry and then slowly add water, saturating the soil.  If you live in a dry climate, it's probably a good idea to mist your plant regularly as well.

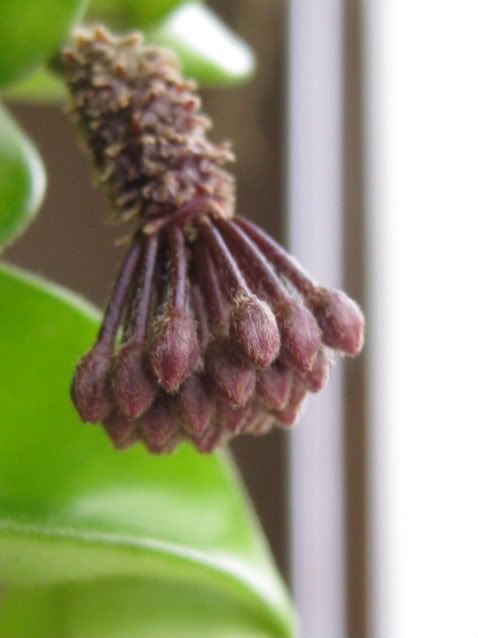
The plant itself is beautiful, but the main reason I like hoyas so much is the beautiful and yummy smelling blooms!!  They bloom from Spring to mid Fall here, but colder areas will have a slightly shorter growing season.  The blooms can be born on new stem growth, or on older stubs where flowers have previously bloomed.  The following picture an example of the latter.

Photobucket
It only takes a few days for the flowers to open after you see them appear.  The little round buds you see in the above photo will start to take on a glossy, ballooned star shape and begin to spread apart into an umbrella. 
Photobucket
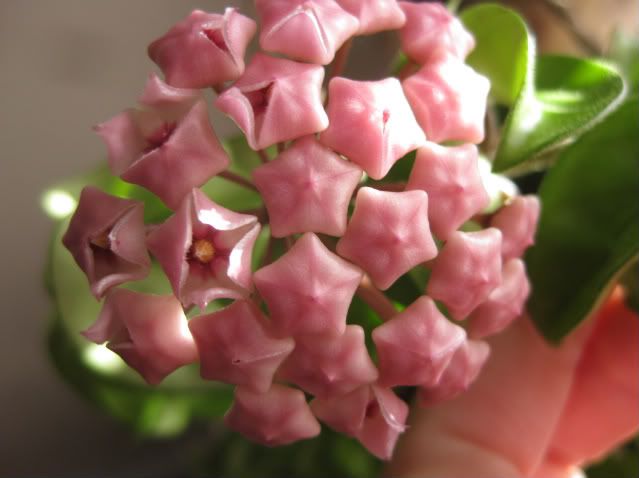
The petals then begin to fold back, showcasing the "inside" of the flower.
Photobucket
The center "star" is glossy, while the outer has a furry look!  This is when you'll be able to really smell them.  To me, they smell just like chocolate, but I've heard some people think they stink!  What?!?  You do have to get close to the bloom to smell their fragrance, though.  As the bloom ages, the smell with get fainter, until you really can't smell it at all.  For me, the blooms usually last around 2 weeks from start to finish.
Photobucket
This evergreen houseplant truly is beautiful and I highly recommend it!  Treated properly, it will bring happiness to you for years!  And, it is super easy to propagate from cuttings and air layering!

Update: Two days after posting this my I noticed a flower bud just starting to form on my hoya.  The entire process of budding, flowering and finally the blooms falling off lasted until February 25!